Quantcast
Channel: Windows 10 Archives - FAQforge
Viewing all 392 articles
Browse latest View live

How to use a Laptop as second Monitor on Windows

$
0
0

You have a laptop and want to use it as a second monitor to mirror or extend your Windows Desktop? Here are some options for the different Windows versions.

For Windows 8 and Windows 10 you can use the software Spacedesk, it is available for free as long as you use it for personal or non-commercial purposes and can be downloaded from the vendor website here:

http://spacedesk.ph/download/

Spacedesk has full support for Aero and can mirror or extend the Desktop to the second device. Spacedesk has to be installed on both devices.

For Windows 7 and earlier Windows versions there is a nice Freeware called ZoneScreen that is able to Extend- or Mirror the Desktop to another Windows Computer or a Mobile device. The drawback with this software is that it does not support Aero, so the Aero Desktop has to be switched off.  It seems as if its development has been discontinued

ZoneScreen is available here:

http://www.zoneos.com/zonescreen.htm.

Alternatives

If you just need a Desktop mirror (and not a Desktop Extension) then you could try a VNC software like RealVNC.

The post How to use a Laptop as second Monitor on Windows appeared first on FAQforge.


Download Windows 10 as ISO file

$
0
0

Do you like to update your PC the traditional way by booting from a USB stick or DVD instead of using the Windows update function? Or want to do a fresh install to get a clean System?

Fortunately, Microsoft provides a download tool to download Windows 10 as ISO files for 32 and 64 Bit directly.

The Windows 10 ISO downloader

The Download tool is available directly at microsoft.com:

https://www.microsoft.com/en-us/software-download/windows10


The post Download Windows 10 as ISO file appeared first on FAQforge.

How to disable the “Get Windows 10” icon in the notification area?

$
0
0

The “Get Windows 10” icon in the tray has been installed as part of the KB3035583 Windows update.

https://support.microsoft.com/en-us/kb/3035583

To remove that icon permanently uninstall this update in the windows software center. The Windows update function might offer this update again in future, so don't forget to hide it in Windows update so that it does not come back.

If you still see the icon after uninstalling and a reboot, then check if there are still files of the update in C:\Windows\System32\GWX. If that's the case, delete this directory.

The post How to disable the “Get Windows 10” icon in the notification area? appeared first on FAQforge.

How to uninstall Windows 10?

$
0
0

Get ready for the turnaround

You’ve been a proud owner of the latest Windows 10 for more than a week now, but soon enough you found that the new operating system’s just not effective that much for you? The reason could be anything like a mission critical program doesn’t work right, or you hate the new Start menu, or maybe Cortana is giving you the skulk.

Didn’t get familiar with Windows 10?

If it is that’s the problem with you, it’s about time to downgrade back to your past operating system and try again later. If you’ve upgraded recently i.e. within the last month, it’s simple to uninstall Windows 10 and drive your PC back to its original Windows 7 or Windows 8.1 operating system. This leaves you with an open option to upgrade to Windows 10 again later, whenever you wish to.
You are very much eligible to reinstall the version of Windows that came with your PC using fresh installation media and its product key, even if it’s been more than a month.

Downgrade Windows 10

During upgrade of a PC to Windows 10 (if you didn’t perform an all in all clean install, but just an upgrade), you have an easy option that allows you to go back to the previous version of Windows.

Using Windows Recovery for Downgrade

Ahead of using the rollback option, you should be sure to set a few things set up.

  1. First confirm that all your data is backed up on an external hard drive.
  2. Also keep your old Windows 7 or 8 product keys handy just in case you need them, you probably shouldn’t but still it never hurts to be careful. You won’t need to save your Windows 10 product keys as they are manipulated in a different way than in previous versions of the OS.
    The keys for your previous operating may `be available on a sticker on the back of your PC or included with the system discs you got with your PC.

After organizing all this, it’s time to get started with the reverse operation.


  • It can be accessed by opening the Start menu and selecting "Settings".
  • There click on the “Update & security” icon and select “Recovery.”
  • Now go down to the option “Go back to Windows 7″ or “Go back to Windows 8.1″ option.
  • Click the "Get started" button, just in a matter of seconds a process will start to get rid of your Windows 10 install and bring back your last Windows install. You would be asked by Microsoft the reason for your going back.

One thing to keep in mind while you prepare to downgrade to your older operating system is that you still should have your Windows.old folder at C:\Windows.old. If you deleted that folder after upgrading, or you’ve done a post-upgrade clean install of Windows 10 then you can't downgrade.

Because if a month has passed — or if you’ve run the Disk cleanup tool and detached the “Previous Windows installations” files or deleted the C:\Windows.old folder by hand, you have lost this option. After a month to free up space, Windows 10 appears to automatically remove the old Windows installation files


After you have got your old OS back in place, you need to fiddle with it a little to get right your setup. Like reinstallation of older programs. If you had a different password on the previous OS then you had on Windows 10, you’ll have to sign-in with the older one.

If  the 30-day grace period has passed and you want to go back to your last operating system, you’ will have to get recovery discs created from your original Windows 7 or 8 machine to get done the clean installation of your older OS or have a system image backup put away somewhere.

If none of this works for you, as the last resort you will have to install Windows 7 or 8.1 in a virtual machine on your Windows 10 system—if you find a product key and the older system discs. It’s painstaking, but a VM will work surprisingly well for those times when only Windows 7 or 8.1 will do.

The post How to uninstall Windows 10? appeared first on FAQforge.

How to disable Cortana in Windows 10

$
0
0

Cortana is a new feature that comes packaged with Windows 10. The feature is very similar to Siri that is found on the Apple iPhone and much like Siri it acts as a personal assistant to you.

Cortana can be accessed via the start menu search function and you can either type questions and instructions or ask them using your microphone.

Whilst Cortana can be useful in some scenarios it can also be very annoying and whilst you may like to disable it doing so is slightly harder than you might think – Microsoft being Microsoft they really want you to use these new features that they come up with and disabling Cortana will not stop it from running in the background.

How to disable Cortana permanently

Luckily there is a supported method for completely disabling Cortana in Windows 10 and it can be done as follows.

Step 1: Disable Cortana from the search menu

Cortana can be partially disabled by clicking on the search icon at the bottom left of Windows 10, clicking on the gear icon in the left-hand bar and then clicking “Off” under the Cortana web searches section.

img1

Step 2: Uninstall Cortana

After you have disabled Cortana you can completely uninstall it in order to prevent it from running in the background.

Click on the start menu and then type in PowerShell, right click on PowerShell and select “run as administrator”.

img2

In the PowerShell window type the following and press enter:

Get-AppxPackage | Select Name, PackageFullName
Remove-AppxPackage Microsoft.Windows.Cortana_1.4.8.176_neutral_neutral_cw5n1h2txyewy

This command will completely remove Cortana, it will not be accessible from the start menu and the process will no longer run in the background.

There are also other methods of removing or completely disabling Windows Cortana but this method follows standard Microsoft practices and is therefore likely to have less impact on the operating system than other more controversial methods such as renaming the Cortana folder.

The post How to disable Cortana in Windows 10 appeared first on FAQforge.

How to Use Virtual Desktops in Windows 10

$
0
0

By default, there is only a single desktop available in every operating system including Windows 10. However, we can always create more virtual desktops right according to our own choice. Virtual desktops let us stay organized if we are habitual of using multiple applications at the same time. We can group similar type of applications on one desktop and use other virtual desktops for other different types of applications. The article below will tell you how to create a virtual desktop, how to switch between multiple desktops, how to move a window from one desktop to another and after doing everything, how to close a virtual desktop.

How to Add a New Virtual Desktop

For creating a new virtual desktop, you need to perform the following steps:

In your taskbar, locate the Task View icon. It is shown below:

Windows taskbar

Click on this icon to open task view which is shown below:

Open task view

From the window shown above, click on the + New Desktop icon shown at the top left. After this, a new virtual desktop i.e. Desktop 2 will be added to your list as shown below:

Add a new virtual desktop

You can also press Win+ Ctrl+ D to create a new virtual desktop without following any of the above-mentioned steps.

How to Switch Between Multiple Desktops

For switching between multiple virtual desktops, just click on the task view icon from the taskbar. Here you will find a list of all your desktops. Just click on any desktop on which you want to work from this list. In this way, you will be able to switch between different desktops. For example, if I want to go to my Desktop 2, I will simply go to the task view and click on Desktop 2. So now, my second desktop will be displayed which is shown below:

Switch to second Desktop

Moreover, you can also perform the same task by pressing Win+ Ctrl+ left/ right arrow key.

How to Move a Window from One Desktop to another

To perform this task you need to do the following steps:

Open task view by clicking on its icon on the taskbar.

From the list of available desktops, hover over the desktop whose window you want to move. By doing this, you will find a list of all the windows that are currently opened on that particular desktop. For example, I want to move the Google Chrome window from my Desktop 2 to Desktop 1. Therefore, I will hover over my Desktop 2 and its list of windows will appear. This list is shown below:

Move window to another desktop

Now just right click on the Google Chrome window shown in the list, from the cascading menu, select Move to, and then click on Desktop 1. This is shown below:

Window moved to desktop 2

In this way, your Google Chrome window will be moved to Desktop 1. You can also achieve the similar functionality by dragging the Google Chrome window from the list and dropping it in Desktop 1.

How to Close a Virtual Desktop

For closing a virtual desktop, just click on the task view icon located at the taskbar. Click on the X icon present at the top right corner of the desktop that you want to close. This is shown below:

Close virtual desktop

Now, the Desktop 2 will no longer be there in the list of desktops. You can do the same thing by opening Desktop 2 and pressing Win+ Ctrl+ F4.

Conclusion

In this way, you can very easily create and work with virtual desktops. They let you organize your tasks according to your choice and also prevent your workplace from looking messy. After taking full advantage of the virtual desktops, you can simply close them without getting yourself into any trouble.

The post How to Use Virtual Desktops in Windows 10 appeared first on FAQforge.

How to Restore Missing Desktop Icons in Windows 10

$
0
0

How to restore missing Windows 10 Desktop icons

Sometimes while working in Windows 10, it happens that we accidentally delete some desktop icons. In future, we may need those icons so it is always better and advisable to restore those missing icons beforehand by making use of a very helpful feature provided by Windows 10. Mostly, the default icons are This PC, Recycle Bin, Control Panel, Network etc. However, if you do have any other default icons too, then you can restore them very conveniently. In this article, we will guide you through a very simple method to restore your missing desktop icons on Windows 10.

Restoring Missing Desktop Icons on Windows 10

In order to perform this action, you need to proceed as follows:

Just right click anywhere on your desktop. A cascading menu will appear which is shown below:

right-click on Windows Desktop

From the menu displayed above, click on Personalize. The following window will appear:

Windows 10 Desktop personalize dialog

From the window shown above, click on the Themes tab. The themes screen is given below:

Themes tab

Now click on Desktop icon settings under Related Settings shown on the right-hand side.

A new Desktop icon settings window will appear which is shown below:

Desktop Icon settings

From the window shown above, click on Restore Default.

Then click on OK and all your missing desktop icons will be restored.

Conclusion

By following the steps mentioned above, you can easily restore all the missing icons that you previously deleted accidentally. So now, it is absolutely not a big deal for you to get back your missing default icons using Windows 10.

The post How to Restore Missing Desktop Icons in Windows 10 appeared first on FAQforge.

How to Customize Command Prompt’s Screen Color in Windows 10

$
0
0

As we all know that the traditional outlook of command prompt is not that much appealing and catchy. Sometimes while working in that environment, it gets very much dull and boring and you feel the need of modifying or customizing that traditional screen a little so that it can grasp your interest and attention. In the scope of this article, we will try to explain you how you can customize command prompt’s screen color to make it look a little bit attractive. Let us proceed towards our formal explanation.

Customizing the Screen Color of Command Prompt on Windows 10

For doing this, you need to perform the following steps:

Type cmd in the search section of your taskbar.

Open command prompt

From the menu shown in the image above, click on command prompt. Its default screen will appear which is shown below:

Windows command prompt ready to be used

Now, right click on the command prompt icon located at the top left corner as shown below:

Click on command prompt icon

From the menu shown above, click on Properties and a new window will appear.

Command prompt properties

From the window shown above, click on Colors tab.

Colors tab

Here you can choose any color given in the list. For example, if I want to set the screen color to maroon, I will simply click on the fifth color from right and then click OK.

Choose color for command prompt

Now, my command prompt screen will turn maroon as shown below:

Command prompt with red background

Conclusion

This is how you can customize the color of your command prompt screen in a very few simple steps. Your screen color will stay as it is unless you change it otherwise. Hence, you can avoid your command prompt environment to look dull and boring.


The post How to Customize Command Prompt’s Screen Color in Windows 10 appeared first on FAQforge.


How to Disable Timeline in Windows 10

$
0
0

Windows 10 has introduced a feature in its latest update to keep a track of all the activities that you perform on your PC. This feature maintains a timeline of your history i.e. your recently viewed files etc. Sometimes, you do not want to use this feature due to some privacy issues. You just do not want your activity history to be saved on your PC. For doing this, you need to disable the timeline. In the following article, we will try to explain to you that how you can disable your timeline in Windows 10.

Disabling Timeline in Windows 10

For disabling your timeline in Windows 10, you need to perform the following steps:

Type Settings in the search section of your taskbar.

Search for settings app in taskbar

Click on the search results to launch the settings window.

Start settings app

As soon as you will click on it, the settings window will appear which is shown below:

Windows settings

Now click on the Privacy tab located in the bottom row to open privacy-related settings.

Open Privacy tab

Click on Activity History tab located at the left of the screen shown above. The activity history window will pop up which is shown in the following image:

Open Activity history

To disable timeline, just uncheck the field saying, “Let Windows collect my activities from this PC.” This field is highlighted in the image below:

Disable Let Windows collect my activities from this PC.

Now the timeline feature is disabled from your Windows 10 but your PC still has the history that it has saved previously. If you want to remove the previously stored history, you need to perform the next step.

Just click on the Clear button located below the Clear activity history field. This field is highlighted in the image below:

Clear activity history

Now your previously saved history is also deleted from your PC.

Conclusion

By following the above-mentioned steps, you can simply prevent your PC from storing your activity history in it. And if you want your previously saved history to be deleted too, then you can just perform an additional step i.e. Step 9. Now there is absolutely no track of your visited places and your privacy is ensured.

The post How to Disable Timeline in Windows 10 appeared first on FAQforge.

How to Disable Screen Auto Rotation in Windows 10

$
0
0

Disable Windows Screen Rotation

Screen autorotation is indeed a very fascinating feature provided by Windows 10 but at times, it becomes frustrating for the user who does not want to have the rotated view of the screen. To resolve this issue, one needs to disable the screen autorotation. How to disable this feature in Windows 10 is explained in the following article.

Disabling Screen Autorotation in Windows 10

For disabling screen autorotation in Windows 10, you need to perform the following steps:

Type Settings in the search section of your taskbar.

Type settings into search bar

Click on the search results to launch the Settings screen.

Launch settings screen

As soon as you will click on it, the settings window will appear on the screen which is shown in the image below:

Windows Settings

Now click on System to open the system related settings.

System settings

In the display tab, you will find a field named "Rotation Lock" which will be off at the moment. Just toggle it to the "on" state to disable screen autorotation in Windows 10.

Conclusion

Now you can disable your annoying auto-rotating screen just by following a very few simple steps. You can enable the autorotation feature again by following the same set of steps with a slight modification and that is in step 5 will need to turn off the toggle button corresponding to the field of Rotation Lock and your autorotation feature will be enabled again.

The post How to Disable Screen Auto Rotation in Windows 10 appeared first on FAQforge.

How to Temporarily Lock the PC if Someone Tries to Access it with a Wrong Password in Windows 10

$
0
0

Windows Lock PC

Many times it happens that you find someone trying to break into your account. It is indeed a very alarming situation because once an intruder gets into your PC; he can do absolutely anything with your private and personal data. This act breaches your privacy. To prevent this from happening, people usually set passwords for their accounts so that anyone who wants to use your account must know your password. Only then, he will be granted an access to your account.

However, do you think that setting up an account password is enough? No, it is not sufficient. Because someone may guess your password by entering some wrong passwords and eventually knowing the correct one. In this case, you need to take some other measures to protect your PC. One such solution is of locking your PC for a while if someone tries to enter a wrong password for some specified amount of times. In this article, we will tell you the method through which you can temporarily lock your PC if someone tries to access it with a wrong password in Windows 10.

Locking the PC Temporarily in Case of Wrong Password Attempt

In order to perform this action, you need to proceed as follows:

Type cmd in the search section of your taskbar and click on the search results to launch the command prompt window.

Launch cmd

As soon as you will click on Command Prompt, its window will pop up on the screen. It is shown in the following image:

Windows command prompt

First, you need to check if you have already set the password limit or not. For doing this, type the command net accounts in your command prompt window and press enter. This command is shown below:

Run - net accounts

As soon as you will press enter, some information will be displayed on the command prompt which is shown below:

Account details

As you can see that the field corresponding to the title “Force user logoff how long after time expires?” is set to Never which means that currently, you have set no limits on wrong password attempts so you will need to modify this in order to protect your PC.

Now you need to define a threshold for failed password attempts so that as soon as the threshold value is reached, your PC is locked automatically. For doing this, type the command:

net accounts /lockoutthreshold:5

and press enter. It means that if someone attempts to enter a wrong password for 5 times, your PC will be locked. You can set any threshold value of your choice. This command is shown in the image below.

Set lockout threshold

As soon as you will press enter, a message will be displayed saying “The command completed successfully” which means that your lockout threshold value is correctly set.

Now, you need to set a lockout duration, which will specify that for how long your PC will be locked after the failed password attempts. For doing this, type the command:

net accounts /lockoutduration:20

and press enter. It means that once the lockout threshold value is reached, your PC will be locked for 20 minutes. You can set any lockout duration value of your choice. This command is shown in the image below.

Set lockout duration

As soon as you will press enter, a message will be displayed saying “The command completed successfully” which means that your lockout duration value is correctly set.

The last thing you will need to do is to define the time for a retry after the lockout. For this, you will need to set a lockout window. Type the command:

net accounts /lockoutwindow:20

and press enter. It means that you will be able to make a retry after 20 minutes of a lockout. You can set any value of your choice for the lockout window. This command is shown in the image below.

Set Lockout Window

As soon as you will press enter, a message will be displayed on the command prompt saying, “The command completed successfully” which means that your lockout window is correctly set.

You can confirm all the changes you have just made by typing the command net accounts in the command prompt and pressing enter.

Conclusion

In this way, you can protect your PC or your account from being misused by intruders. These changes will be saved in your PC until you reset the settings to default. Now, no one will be able to break into your PC without knowing your password.

The post How to Temporarily Lock the PC if Someone Tries to Access it with a Wrong Password in Windows 10 appeared first on FAQforge.

5 Ways to Find Your Current IP Address in Windows 10

$
0
0

Cet current IP address in Windows 10

IP address or Internet Protocol Address is some numerical digits that are used to uniquely identify a device’s name and its location. IP addresses are assigned to each and every device that is connected to the network whether it is a personal computer or a printer or a scanner etc. Many times you need to know the IP address of a device mainly for the communication over the network. Now, how to find the IP address of a particular device say a PC is the real question. This question will be answered in the article below.

Methods to Find the Internet Protocol Address

Following are the five most common ways to find the IP address of PC in Windows 10:

Method 1: Use ipconfig command

The simplest and the easiest way of finding the IP address of a device is by using the command prompt. For this method, you need to proceed as follows:

Type cmd in the search section of your taskbar and click on the result.

Search for cmd in taskbar

This will open up a window which is known as command prompt and is shown below:

Windows command prompt

In your command prompt, type:

ipconfig

and press enter.

Run ipconfig command

Some details will be displayed on your command prompt as soon as you will press enter. Under those details, try to locate “IPv4 Address”. Once you locate that, the IP address written right next to it will be the IP address of your device. It is shown in the image below:

IPv4 address as shown by ipconfig command

Method 2: Use the Task Manager

The second method of finding your IP address is through Task Manager. For this, you need to perform the following steps:

Right click on your taskbar. A cascading menu will appear. From that menu, select task manager. Task manager window will appear on the screen which is shown below:

Windows Task Manager

From this window, select Performance tab which is shown below:

Performance tab

From the Performance tab shown above, click on Wi-Fi. The window corresponding to Wi-Fi will display the IP address of your device against the title of IPv4 address. It is highlighted in the image below:

IPv4 address shown on Wi-Fi tab

Method 3: Use Settings > Network Properties

Another method of finding the IP address is through Settings. In order to find your IP address from settings, you need to proceed as follows:

In the search section of your taskbar, type Settings and click on it. The following Settings screen will be displayed:

Windows Settings

Click on Network & Internet. The following window will pop up:

Network & Internet

Select the Wi-Fi tab.

Windows Wi-Fi Tab

From the window shown above, click on the wireless network to which you are connected. In the given scenario, the name of wireless network is ……

A new window will pop up. Just scroll down to see its properties. Under the properties section, you will find IPv4 address, which will in fact, be the IP address of your device.

Wireless network properties

Method 4: get the IP trough System Information

The fourth method of finding an IP address is through System Information. For this, you need to do the following steps:

Type System Information in the search section of your taskbar and click on it. The following window will open up.

Windows System Information

From the window above, click on Components and it will expand as follows:

Components

From the expanded menu, click on Network.

Components > Network

From the expanded menu of Network shown above, select Adapter.

From the newly opened window, just locate the name of your adapter and you will find the IP address of your device right next to IP address field.

Components > Network > Adapter

Method 5: Get IP address through the Windows Control Panel

The last method of finding the IP address of your device is through Control Panel. For this, you need to proceed as follows:

Type Control Panel in the search section of your taskbar and click on it to open its window:

Windows Control Panel

Click on Network and Internet from the window shown above. You will now see the following window:

Network an Internet

Click on Network and Sharing Center.

Network Sharing Center

From the window shown above, click on Change Adapter Settings and then select the network adapter to which you are connected. It is shown below:

Network Adapter

After clicking it, click on View Status of this Connection:

View status of connection

The following General tab will pop up:

Wi-Fi Status

From the tab shown above, click on Details. In the newly opened tab, the IP address of your device will be shown right next to IPv4 address field as shown below:

Network status details

Conclusion

These are all the ways through which you can easily find the IP address of your device. Now you can have a very good network communication, as you know the IP addresses of all the devices that are connected to your network. By using the IP addresses of these devices, you can conveniently trace the device’s name and its location. Hence, there will not be any hindrance while communicating over the network now.

The post 5 Ways to Find Your Current IP Address in Windows 10 appeared first on FAQforge.

How to Stop Windows 10 from Rebooting after Updates

$
0
0

Stop Windows from rebooting after Updates

As all of us know that, some system updates require your PC to be restarted automatically after performing those update. This feature is indeed very useful because at times, an update tends to make a change in Windows registry file and this change is not possible to bring about without rebooting your PC. However, sometimes it gets really frustrating. You might be indulged in some important activity such as working on an office project, having a meeting with your boss on a video chat application, copying some files from a flash drive to your PC or submitting an online assignment.

In all such cases, if your PC is restarted automatically without notifying you, then it can prove to be troublesome for you. You can lose your important data, your image can be devastated, you may miss out a deadline and your time will also be wasted. To prevent this from happening, you can stop Windows 10 from rebooting after updates. In this article, we will explain to you the method through which you can prevent Windows 10 from restarting automatically after updates.

Stopping Windows 10 from Rebooting After Updates

For stopping Windows 10 from rebooting after updates, you need to perform the following steps:

Type Settings in the search section of your taskbar and click on the search results to launch a new settings screen. The newly opened settings window is shown in the image below:

Windows Settings

From the window shown above, click on Update and Security tab.

Settings > Update and Security tab

Now click on Advanced options shown at the bottom of the window.

Advanced options

As you can see from the picture shown above that the highlighted toggle button is currently set to the off state, which means that your Windows 10 will restart automatically after updates. To stop this from happening, just set this toggle button to the on state as shown in the image below:

Switch setting to on state

Now your Windows 10 will notify you before restarting your PC instead of restarting it automatically.

Conclusion

By following the method mentioned above, you can prevent your Windows 10 from rebooting your PC automatically after updates without your consent. Rather it will notify you before doing so, so that you can save all your important data before your PC is restarted. I hope this article will prove to be helpful for you.

The post How to Stop Windows 10 from Rebooting after Updates appeared first on FAQforge.

How to Find MAC Address in Windows 10

$
0
0

How to find the current MAC address in Windows 10

The media access control address or mac address of a device is assigned to its network adapter to identify this device during network communication. Just like internet protocol address or IP address, mac address is also used to uniquely identify your device across the network. The major difference between mac address and an IP address is that mac address is used at the data link layer whereas IP address is used at the network layer. Moreover, the mac address remains the same throughout the lifetime of your device. In this article, we will explain to you some methods through which you can find the mac address of your device very easily.

Two Ways of Finding MAC Address in Windows 10

For finding the mac address of your device in Windows 10, you can make use of any of the two methods listed below:

Method # 1: Use the command prompt

You can find the mac address of your device by making use of the command prompt. For doing this, you need to proceed as follows:

Type cmd in the search section of your taskbar and click on the search results to launch the command prompt. The newly opened command prompt window is shown in the image below:

Open Windows Command Prompt

Now type the command:

ipconfig /all

in the command prompt and then press enter. This command is shown in the following image:

Use ipconfig command

As soon as you will press enter, some information will be displayed on your command prompt. Here you can locate your mac address written in front of the Physical Address field. The physical address fields and the mac addresses are shown in the image below:

Mac address as shown by ipconfig command

In the image shown above, the highlighted mac addresses correspond to the following four devices respectively: Ethernet adapter Ethernet, wireless LAN adapter local area connector * 2, wireless LAN adapter local area connector * 4, wireless LAN adapter Wi-Fi. The number of devices will depend upon that how much devices you have connected currently with your system.

Method # 2: Use the Windows Control Panel to find MAC address

The second method of finding the mac address of your device is through the control panel. For doing this, you need to proceed as follows:

Type control panel in the search section of your taskbar and click on the search results to launch the control panel window. The newly opened control panel screen is shown in the image below:

Windows Control Panel

From the window shown above, click on Network and Internet. The interface will change as follows:

Network and Internet center

Now click on the Network and Sharing Center. The interface of Network and Sharing Center is shown in the image below:

Network and Sharing Center

Now left click on your Wi-Fi as shown in the image below:

Wi-Fi settings

As soon as you will click on it, a Wi-Fi status window will pop up which is shown in the image below:

Wi-Fi status window

Now click on the Details button. The details shown in the image below will appear on your screen.

Wi-Fi Details

Here you can locate your mac address corresponding to the Physical Address field. It is highlighted in the following image:

Physical address (MAC)

Conclusion

In this way, you can find the mac address of any of the devices that are connected to your system. Once you know the mac addresses of all the devices, you can easily enable a safe and secure network communication over the data link layer.

The post How to Find MAC Address in Windows 10 appeared first on FAQforge.

How to Create Limited User Accounts in Windows 10

$
0
0

How to add a limited user account in Windows

At times, you feel the need of saving your computer system from certain types of dangerous viruses and other security threats, which you may encounter while installing or updating certain programs on your computer. These malwares can harm your system in a very disastrous manner and can make it extremely difficult for you to recover your data once it is corrupted. To avoid this from happening, you can take certain preventive measures. One of which is to create limited user accounts.

A limited user account is such an account, which is given a limited access by default. It means that limited user accounts are not granted with the administrative privileges. Hence, a limited access account user is not allowed to install and uninstall programs, update, modify or delete system files according to his own choice. In this way, your system is protected because its ability to get itself in trouble while installing new features is taken away from it. Only an administrative account holder can perform such tasks. In this article, we will explain to you the method through which you can create limited user accounts in Windows 10.

Creating Limited User Accounts in Windows 10

For creating limited user accounts in Windows 10, you need to perform the following steps:

Type Settings in the search section of your taskbar and click on the results to launch a new settings window. The settings window is shown in the image below:

Open Windows Settings

From the window shown above, click on the Accounts tab. The accounts window is shown in the following image:

Windows Settings > Accounts tab

Now click on Family and other people located at the left side of the window.

Family and other people

As soon as you will click on it, the following window will pop up:

Family and other people window

Now click on Add someone else to this PC. This option is highlighted in the following image:

Add someone else

As soon as you will click on this option, the following window will launch:

Ho this person will sign in

From here, click on I do not have this person’s sign-in information. This is shown in the following image:

I do not have this person’s sign-in information

When you will click on this option, the interface of the screen will change as follows:

Create the account

From here, click on Add a user with a Microsoft account.

Add a user with a Microsoft account

As soon as you will click on it, the following window will be displayed:

Create an account for this PC

Now enter any username and password of your choice. You will be asked to enter the password twice to confirm it. You can also add a password hint and then click Next.

As soon as you will click Next, your newly created account will become visible in the Family and other people tab. In this example, I have created a limited user account with the name Ayesha. It is highlighted in the following image:

New account has been added

Your limited user account is now created. To use your newly created limited user account, you need to perform the following steps.

Click on the Windows icon located at the bottom left of your taskbar. It is highlighted in the image below:

Windows icon in Taskbar

Now from the cascading menu, click on the users icon which is shown in the following image:

Click on users icon

Now select your newly created limited user account from the list as shown in the image below:

Select the new account from the list

As soon as you will click on your limited user account, it will prompt you to enter the password of your limited user account. Just insert the password that you have set while creating your limited user account and then press enter. If you have forgotten your password, you can take help from the password hint that you provided for your own remembrance while creating the account. Once you successfully manage to enter the correct password, you can easily use your newly created limited user account or non-administrative account.

Conclusion

By following the above-mentioned method, now you can easily and conveniently create limited user accounts and disable your system to indulge in such activities that might cause harm to it. You can create as many limited access accounts or non-administrative accounts as you want. Such type of accounts are most helpful in organizations for whom their safety, security, and privacy is a major concern. The employers at such organizations can created limited user accounts for all their employees hence taking away their freedom to make modifications to the system files and rendering the system useless in case of any malware attacks. In this way, they can completely secure their computer systems.

The post How to Create Limited User Accounts in Windows 10 appeared first on FAQforge.


How to Resize and Edit Images in Windows 10

$
0
0

Photo editing and resizing is indeed a very useful and attractive skill that everyone these days should master. Its demand is increasing day by day and it is becoming a necessity for almost everyone. It finds its use-cases in every organization whether it is a business firm, or it is an educational institution. Some people also do it for fun or for their personal use. Its biggest demand arises in the marketing and advertising departments of different firms. In these circumstances, there should be such tools available that can help you in resizing and editing your images easily. In this article, we will explain to you some methods through which you can conveniently edit and resize your images using Windows 10.

Resizing and Editing Images and Photos in Windows 10

For resizing and editing your images in Windows 10, you can make use of any of the methods listed below:

Method # 1: Use the Paint application

In this method, we will tell you how you can edit and resize your images using Paint application in Windows 10. For doing this, you need to proceed as follows:

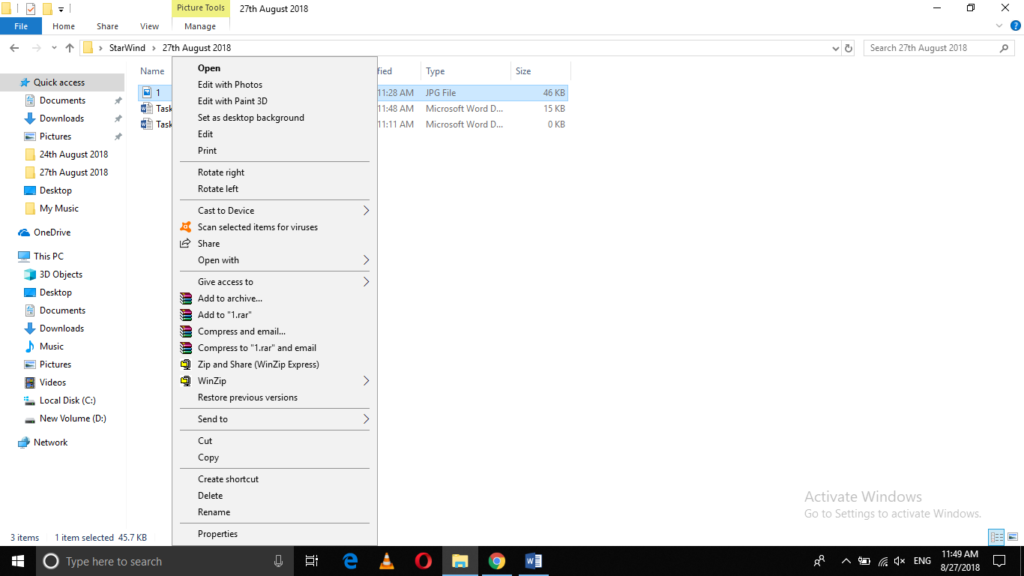
Right click on the picture that you want to edit or resize.

Right click on picture

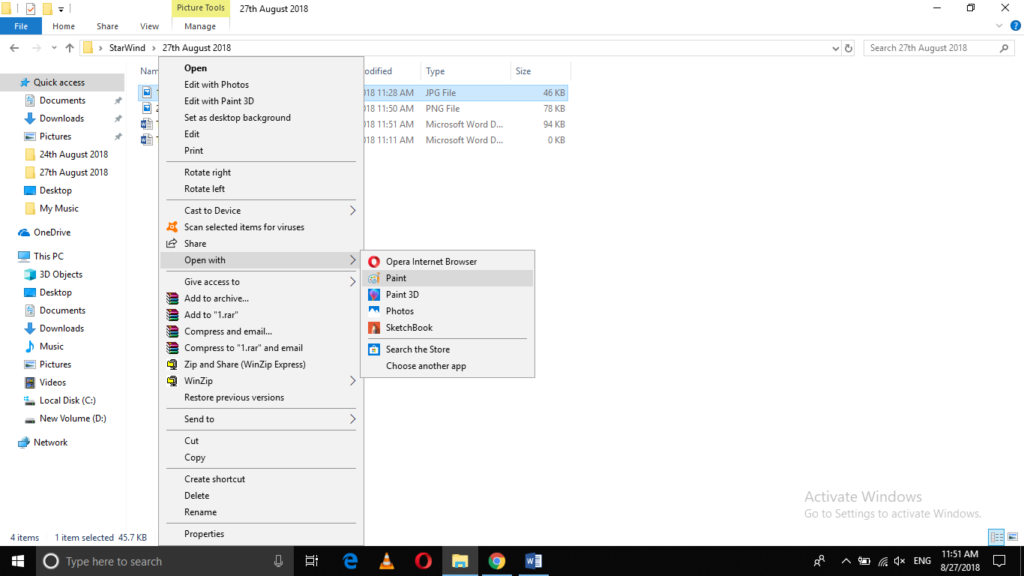
From the cascading menu, click on Open with and then click on Paint from the sub-cascading menu.

Open file with paint

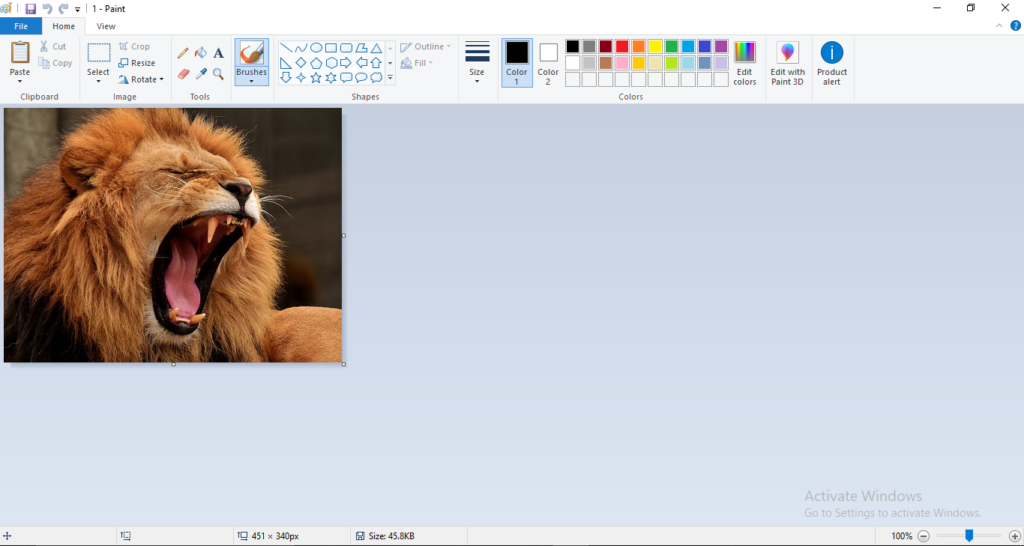
Your selected picture will now open up with paint as shown in the image below:

Picture opened with paint

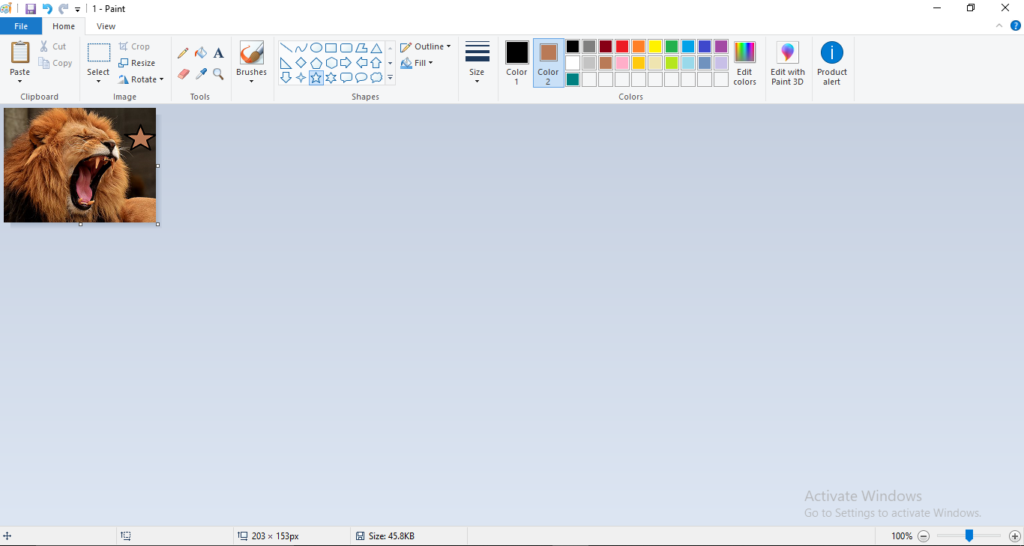
First, we will perform some editing on this picture. For doing this, click on any shape of your choice from the shapes tab. In this example, I have selected the star shape and have drawn a star on my picture as shown in the following image:

Edit the picture

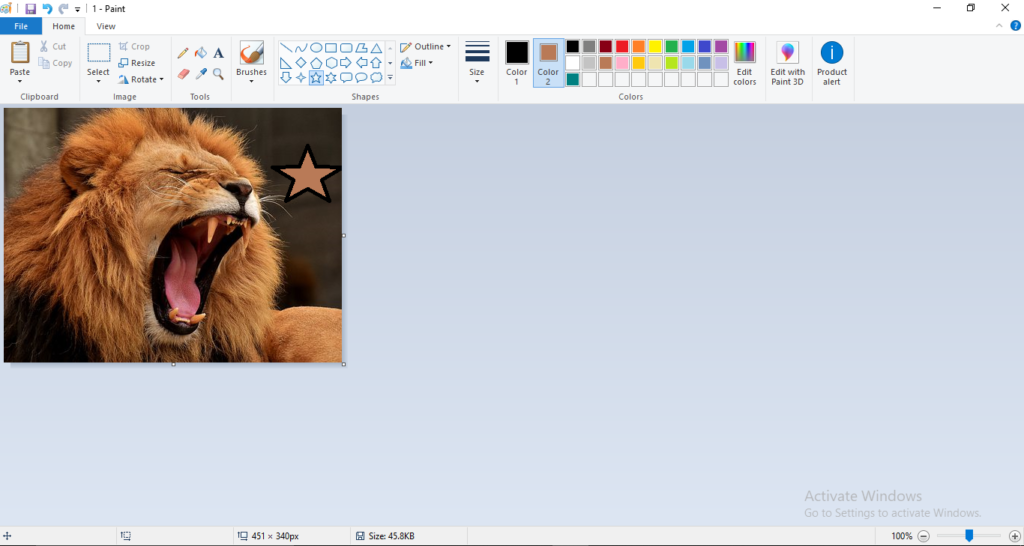
Now I will fill this star with a color of my choice. For doing this, click on Fill drop-down menu and select Solid color from the list. After that, click on Color 2 and then choose any color of your choice from the color palette. In this case, I have filled my shape with a brown color as shown below:

Added a star on the photo

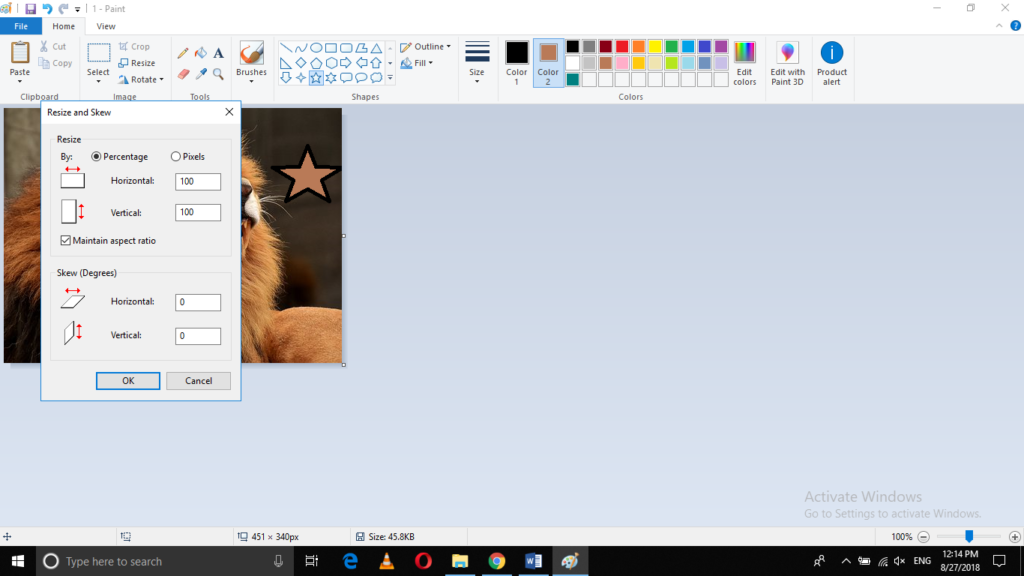
For resizing this image, click on the Resize option located at the Image tab.

Resize option in paint

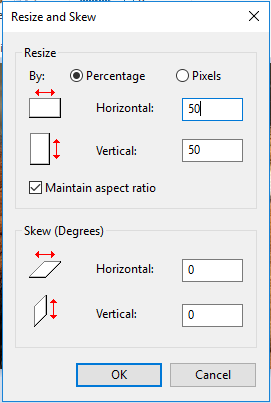
You can resize either by percentage or by pixels depending upon your needs. Resizing by pixels let you specify the different dimensions in detail. In this case, we will resize the image by percentage. For doing this, you just need to give a value for the horizontal dimension and paint will automatically adjust the vertical dimension for you in order to maintain the aspect ratio of the image. I have given the horizontal value of 50. It is shown in the following image:

Resize by percentage

After setting the dimensions, click OK. The size of your photo will be reduced by 50 percent as shown in the image below:

The photo has been resized

Now just press Ctrl+ S to save your newly edited and resized picture. Your picture will now look something like this:

Resulting picture

Method # 2: Use Paint 3D to resize an image

In this method, we will tell you how you can resize and edit your images using Paint 3D application in Windows 10. For doing this, you need to perform the following steps:

Right click on the picture that you want to edit and resize. From the cascading menu, click on Open with and then click on Paint 3D from the sub-cascading menu.

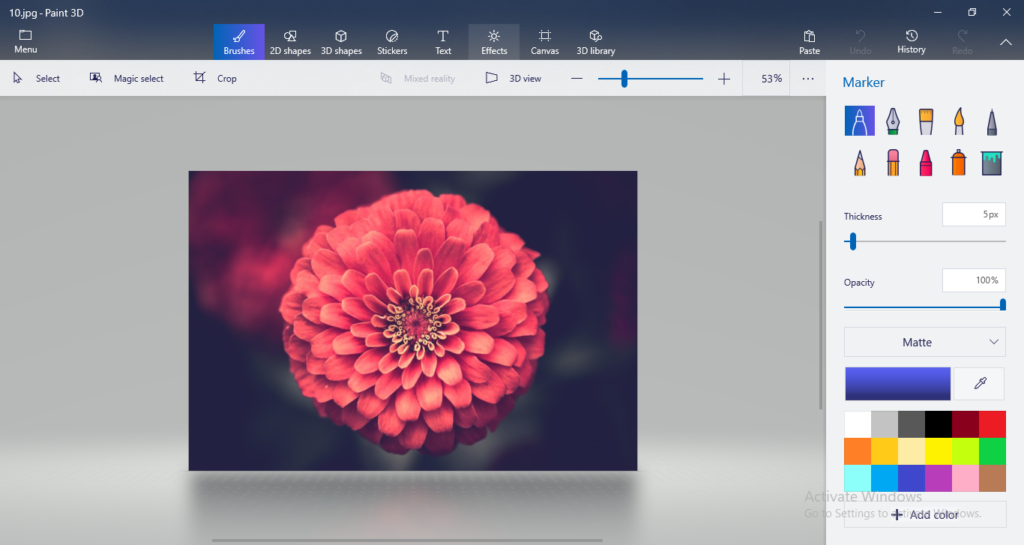
Your selected picture will now open up with Paint 3D as shown in the following image:

Image opened in Paint 3D

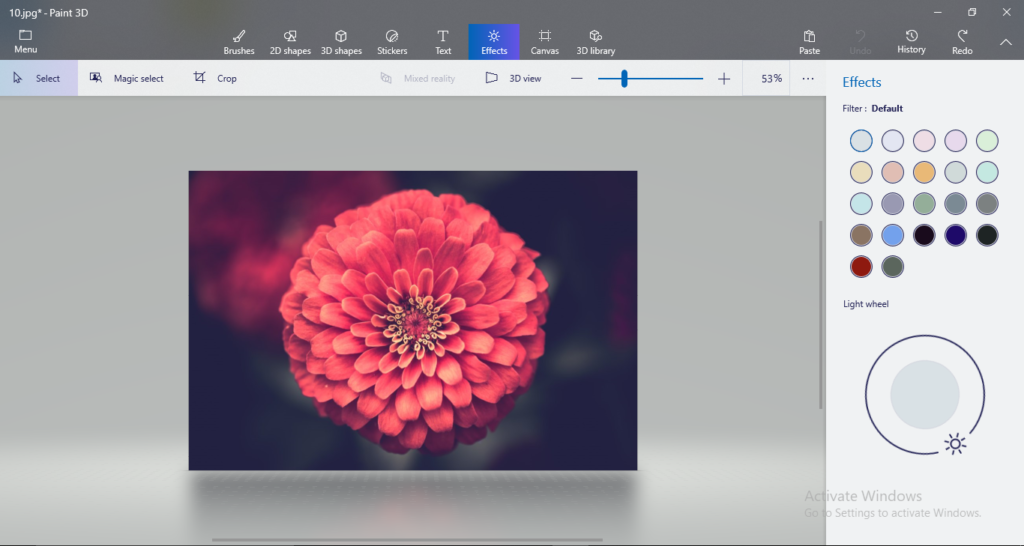
For editing this image, click on the Effects tab.

Effects tab

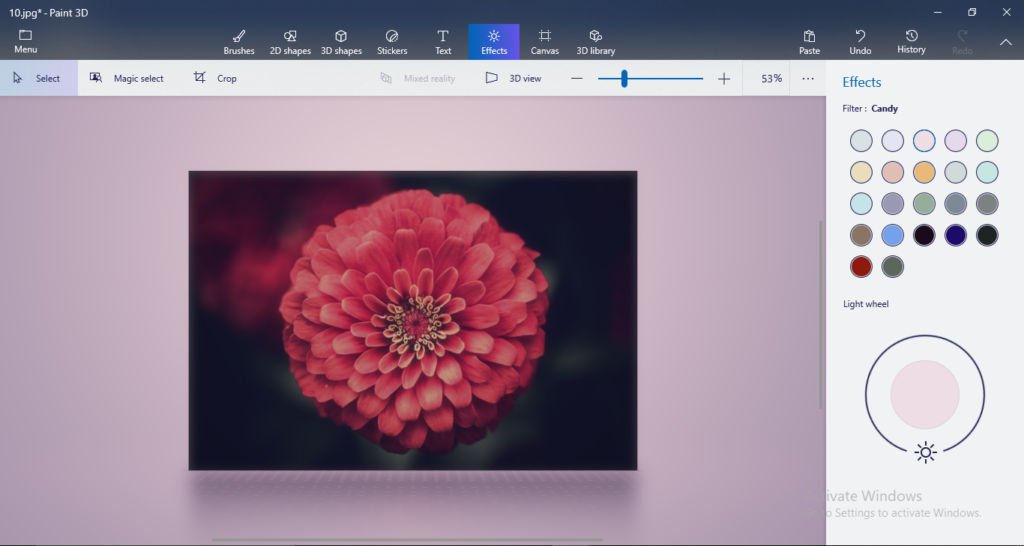
Now click on any filter from the list. In this example, I have selected the third filter from the first row.

Apply a filter

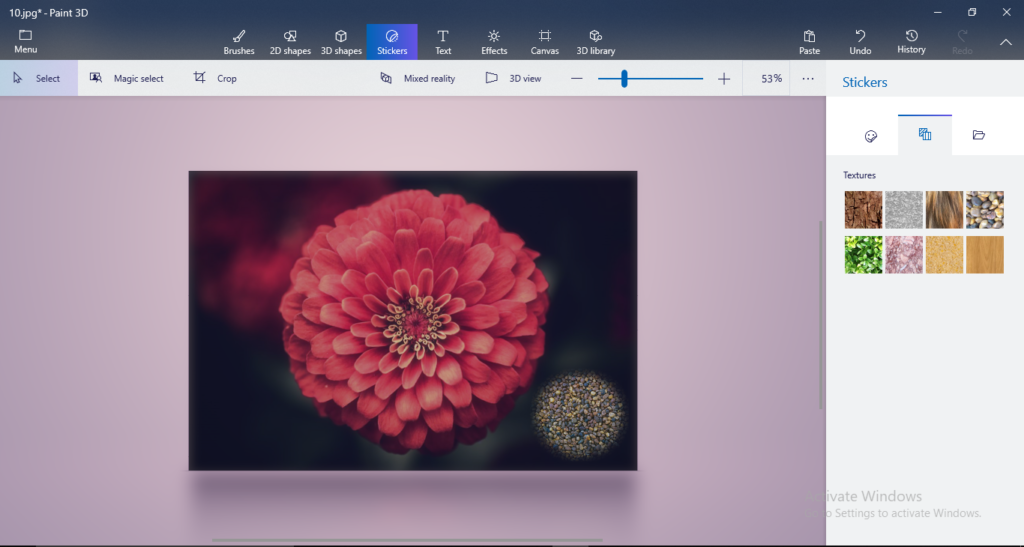
You can add any of the available 2D or 3D shapes and stickers to your image. In this example, I will apply a sticker on my picture. It is shown in the image below:

Apply a sticker

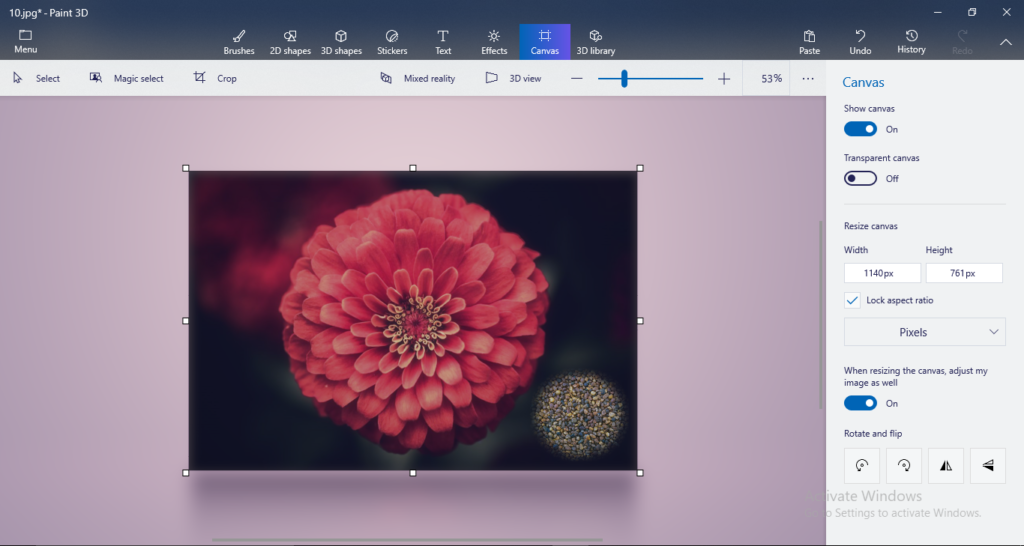
For resizing the image, click on the Canvas tab.

Canvas tab

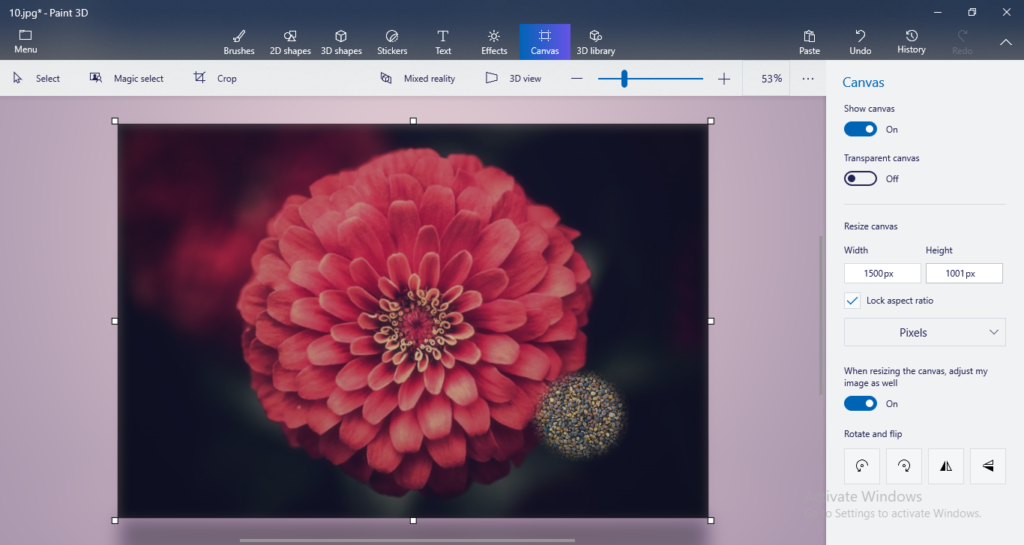
Give any height and width of your choice. In this case, I have given the width of 1500 pixels and Paint 3D has automatically adjusted the height for me.

Enter the height of the new image

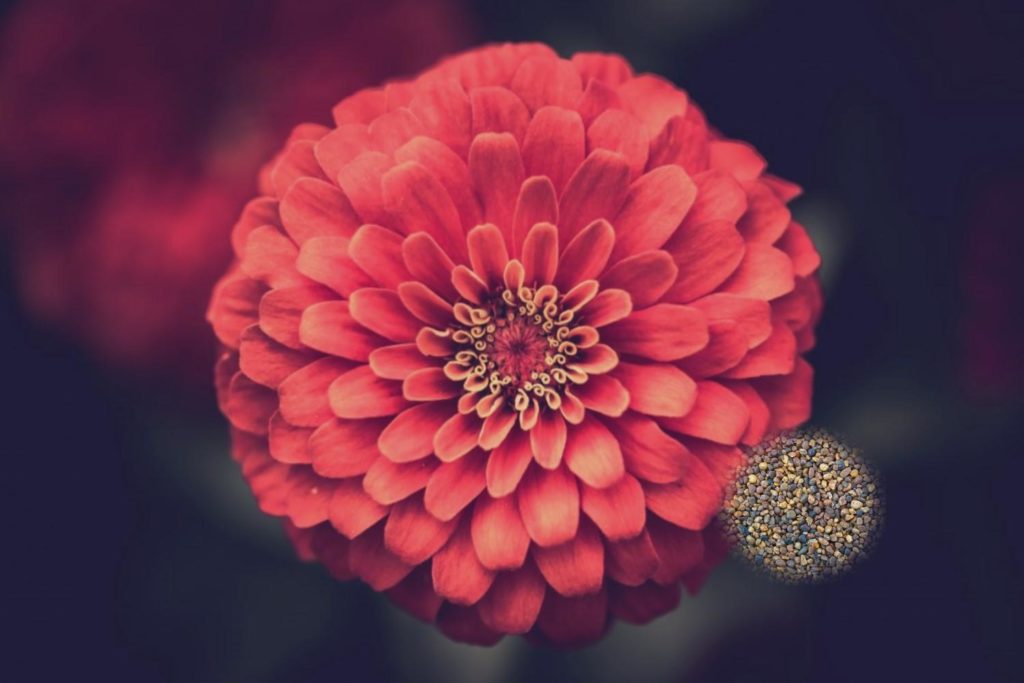
Now just press Ctrl+ S to save your newly edited and resized photo. Your picture will now look something like this:

Save the photo on disk

Method # 3: Using Photos application to resize image

In this method, we will tell you how you can resize and edit your images using Photos application in Windows 10. For doing this, you need to proceed as follows:

Right click on the picture that you want to edit and resize. From the cascading menu, click on Open with and then click on Photos from the sub-cascading menu.

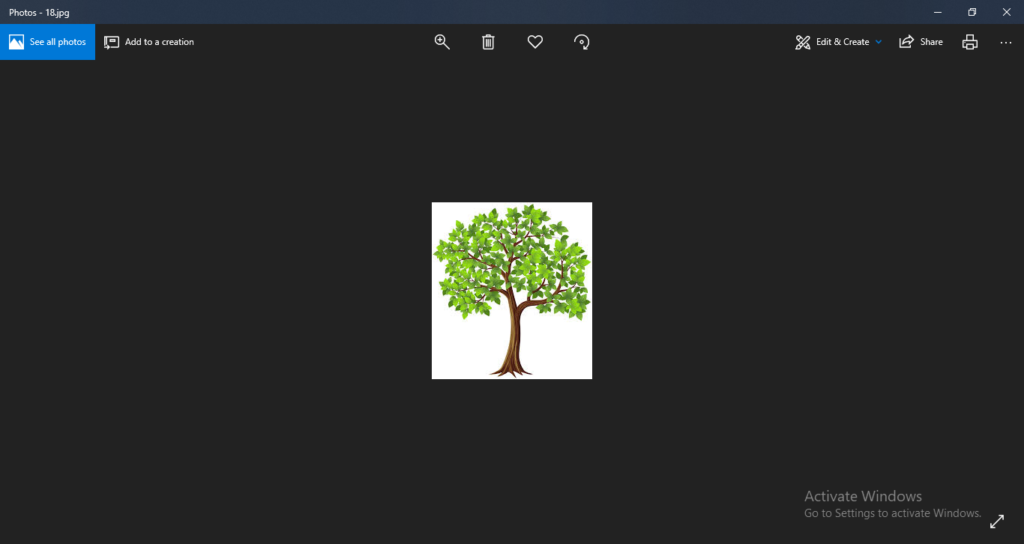
Your picture will now open up with Photos as shown in the image below:

Image opened in Photos application

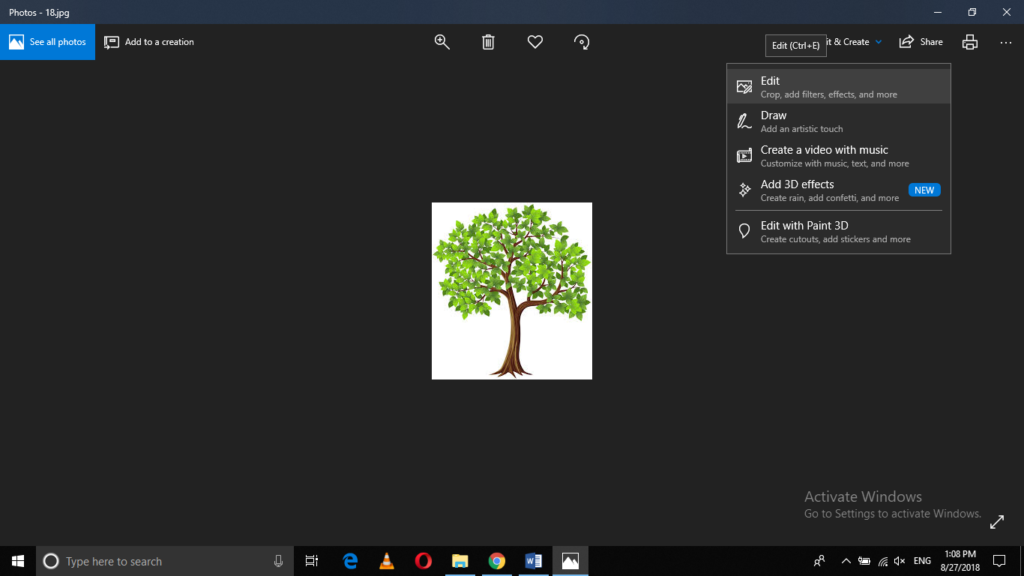
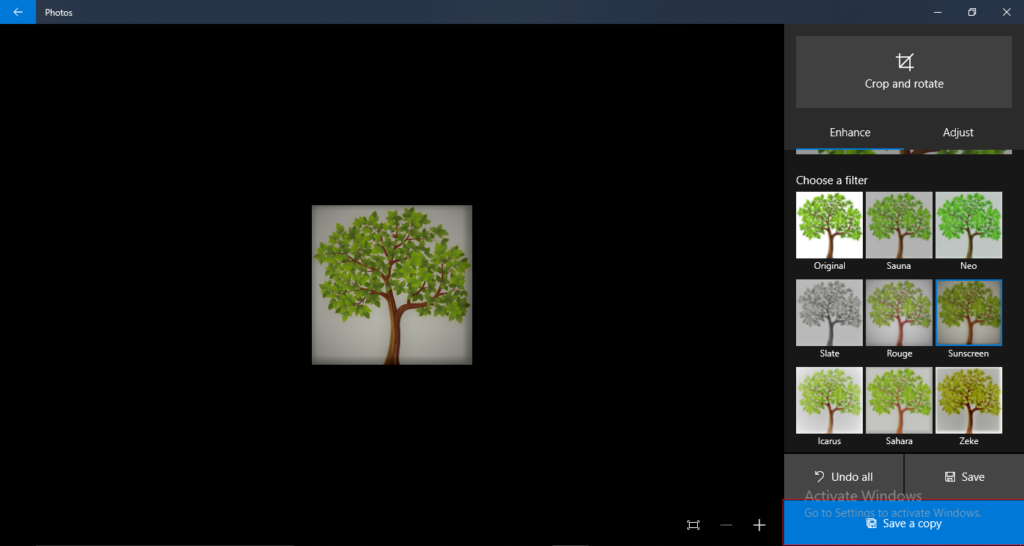
For editing your image, click on Edit & Create and then click on Edit from the drop-down list.

Use Edit & Create option

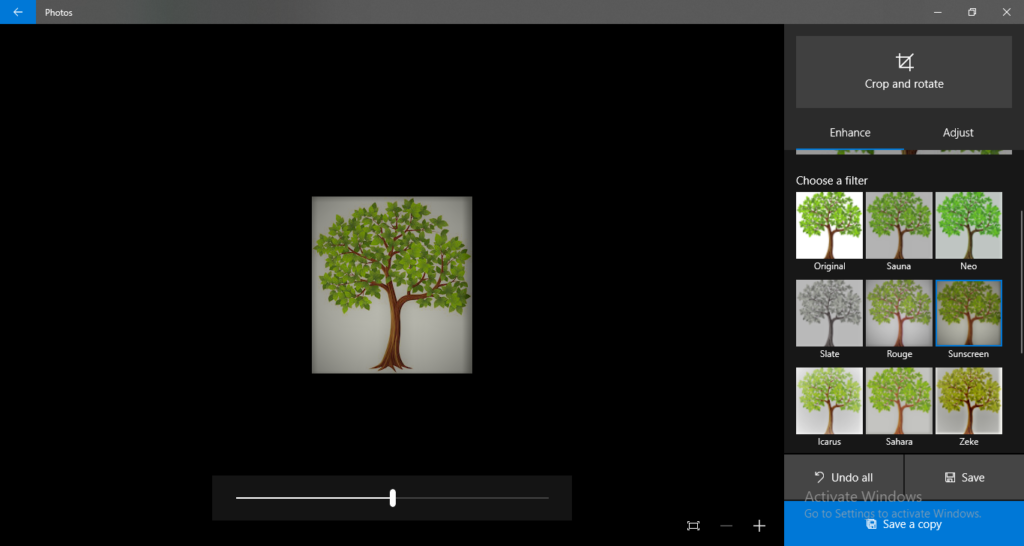
Now from the edit window, choose any filter of your choice. In this example, I have chosen the sunscreen.

Choose a filter

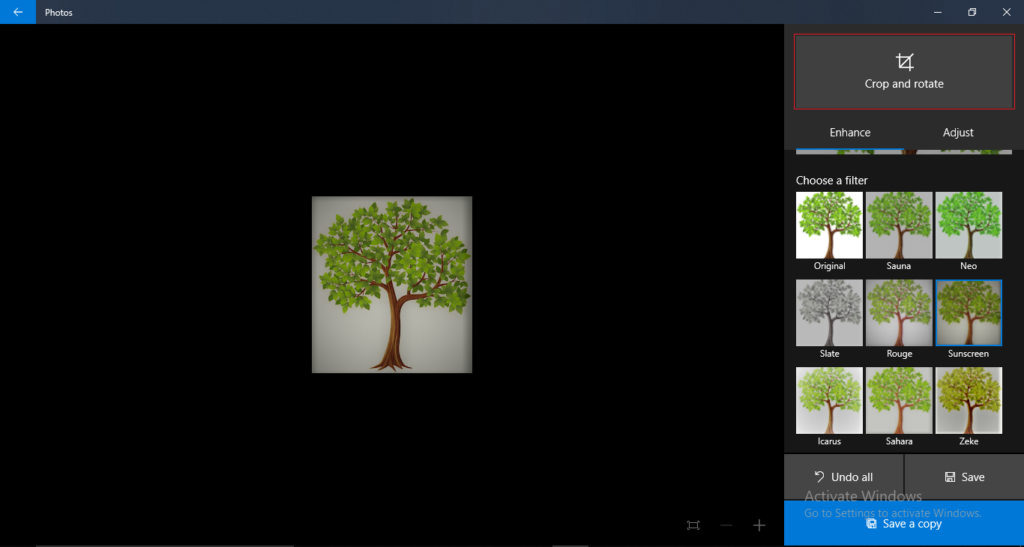
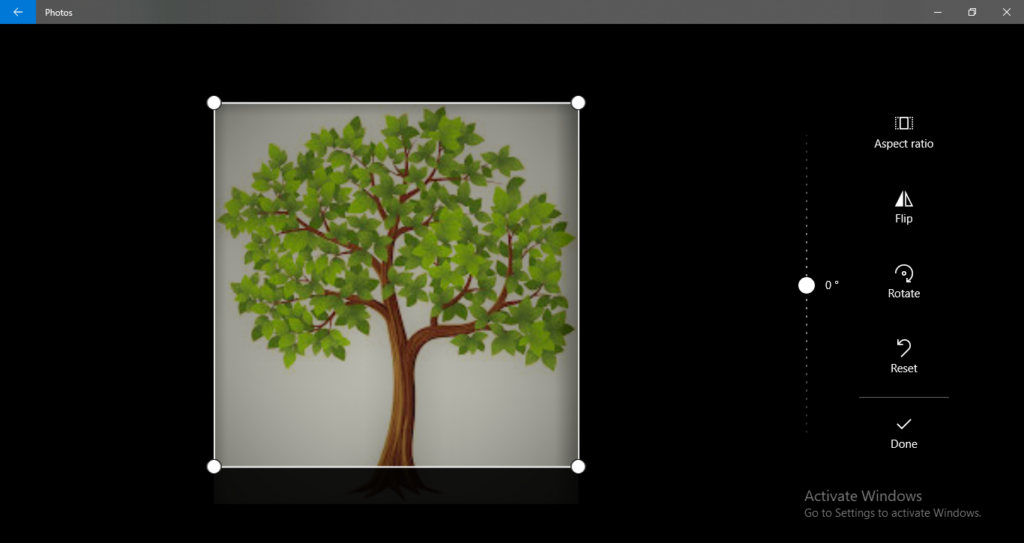
For resizing your photo, click on Crop and rotate.

Crop and rotate

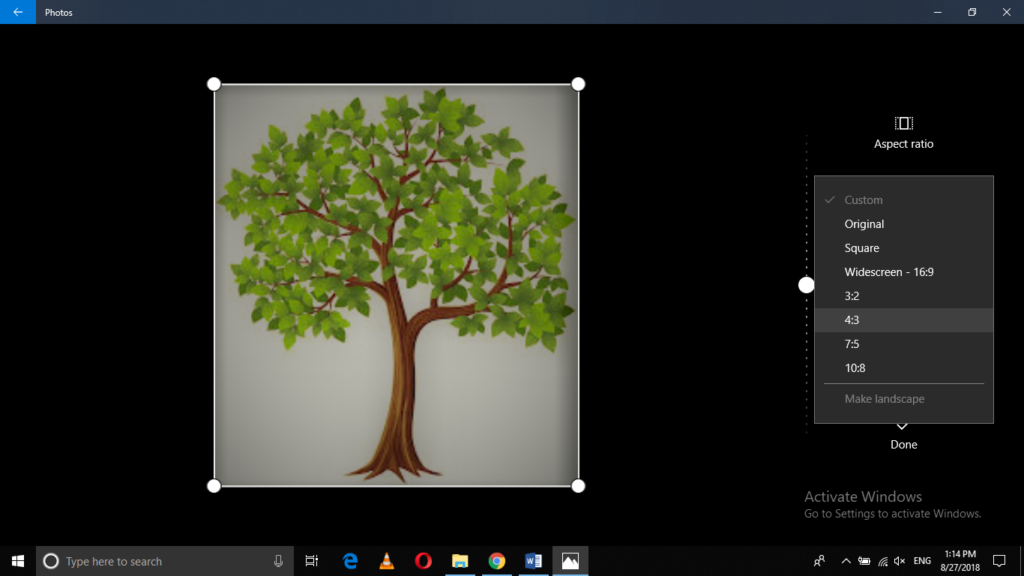
Now click on Aspect ratio and select any aspect ratio of your choice as shown in the image below:

Change aspect ratio of the image

I have selected the square aspect ratio in this case and have adjusted my picture in that square accordingly as shown in the following image:

Choose square aspect ratio

Now click on Done.

After this, click on Save a copy to save your picture as a copy as shown in the following image:

Use: Save a copy to

Your newly edited and resized photo will now look something like this:

The resized image

Conclusion

By following any of the three methods listed above, you can resize and edit your images very easily in Windows 10. These methods have eliminated the need for using paid third-party applications for photo editing. When you can make use of the built-in applications provided by Windows 10, then what is the need of buying expensive software for photo editing and resizing. You can get all this done by following just a few simple steps.

The post How to Resize and Edit Images in Windows 10 appeared first on FAQforge.

How to Turn Your PC into a Wi-Fi Hotspot Using Windows 10

$
0
0

How to Turn Your PC into a Wi-Fi Hotspot Using Windows 10

Windows 10 provides you with a feature through which you can turn your Windows 10 PC into a Wi-Fi hotspot by just following a few steps. By doing so, you are allowed to share your internet connection, whether it is an Ethernet or wireless network, with other computers so that they can use it too. This feature is extremely useful when you are somewhere with a group of friends or office colleagues and all of you are interested in surfing the internet but only one of you has a good internet connection. In this situation, that one person can share his internet with others by the Hosted Network feature provided by Windows 10. In this article, we will explain to you the method through which you can turn your PC into a Wi-Fi hotspot using Windows 10.

Turning Your PC into a Wi-Fi Hotspot Using Windows 10

For turning your PC into a Wi-Fi hotspot using Windows 10, you need to perform the following steps:

Type cmd in the search section of your taskbar and click on the search results to launch a new command prompt window. The newly opened command prompt window is shown in the image below:

Windows Command Prompt

Before proceeding further, you first need to ensure that whether the feature of Hosted Networking is supported by your operating system or not. For checking this, type the command:

netsh wlan show drivers

in command prompt and press enter. This command is shown in the following image:

Show WLan drivers

As soon as you will press enter, a list of all your supported drivers will be displayed. In this information, look for the Hosted Network Supported field. If this field is set to Yes, it means that hosted networking is supported on your PC, otherwise not. It is shown in the image below:

List of wlan drivers

Once you have ensured that hosted networking is supported on your PC, just type the command

netsh wlan set hostednetwork mode=allow ssid=X key=Y

in the command prompt and then press enter. Here, X is the name of your hotspot that you want others to recognize your Wi-Fi with and Y is the password for connecting to your hotspot. You can set any name and password of your choice. For example, I have named my hotspot as Win10 and the password is abcd1234. This command is shown in the following image:

Set hosted network

Once you have created a hosted network, now you need to activate it. For doing this, type the command:

netsh wlan start hostednetwork

in the command prompt and press enter. This command is shown in the image below:

Start hosted network

Now your hosted network is activated so you need to share it with others. For doing this, type control panel in the search section of your taskbar. The control panel window is shown in the following image:

Share hosted network with other users

Now click on Network and Internet as shown in the image below:

Windows > Network and Internet

The Network and Internet window is shown in the following image:

Windows network and internet settings

Now click on Network and Sharing Center as shown in the following image:

Network and Sharing Center

You will be able to see your newly created hosted network in the list of your active networks as shown in the image below. Now you need to click on an internet connection, whether Ethernet or wireless. In my case, I will click on …… network.

Click on your private network

Its Wi-Fi status window will pop up which is shown in the image below:

Wi-Fi status

Now click on the Properties button located at the bottom left of the window.

Wi-Fi properties

Now click on the Sharing tab.

Wi-Fi properties > Sharing tab

In the window shown above, tick the checkbox saying, “Allow other network users to connect through this computer’s Internet connection.” A dropdown list of network connections will be displayed. Select your hosted virtual network from the list. In our case, it is named as Win10 and then press OK to finish.

Conclusion

Now you have turned your PC into a Wi-Fi hotspot by following just a few simple steps. Anyone who can recognize your Wi-Fi with its name and knows the password of your Wi-Fi can connect to your hotspot now. If you want to let your friends or colleagues use your Wi-Fi hotspot, you just need to provide them with the name/ ssid of your Wi-Fi and the password/ key through which they can connect to it. In this way, you can share your internet connection with a group of people without any difficulty.

The post How to Turn Your PC into a Wi-Fi Hotspot Using Windows 10 appeared first on FAQforge.

How to Get Help in Windows 10

$
0
0

How to get Help in Windows

Whenever you work in a new environment or even in a native environment, there are times when you can get in some sort of trouble and you have no clue about how to get yourself out of it. In such a case, it is the responsibility of the operating system you are using, to provide you with an adequate help. Windows 10 also presents you with certain features through which you can get help from it. In this article, we will explain to you the ways through which you can get help from Windows 10.

Four Methods to Get Help in Windows 10

For getting help from Windows 10, you can make use of any of the four methods that are listed below:

Method # 1: Using F1 key

One of the easiest and simplest methods to get help from Windows 10 is using F1 function key. Whenever you are using any application and you get clueless about any of its features, just press F1 while being in that application and the appropriate help wizard corresponding to that particular application will pop up. For example, if I am using Google Chrome and I want to know anything about it, I will simply press F1 while staying in the Google Chrome tab and its help wizard tab will pop up as shown in the image below:

Get help by using F1 function key

Method # 2: Get help by using Cortana

The second method for getting help in Windows 10 is using Cortana. Just click on the search section of your taskbar and the Cortana tab will pop up. Here you can search for any issue or you can read its built-in help manuals by clicking on them. Those help manuals are shown in the following image:

Using Cortana to get help in Windows 10

Method # 3: Use the help menu

The next method of getting help from Windows 10 is through the Get Help menu. To use this menu, just click on the windows icon and scroll down the menu to locate Get Help. Once the Get Help wizard opens up, you can ask for any sort of help. For example, I want to know how to save a word document so I will just type this question in the Get Help wizard and it will instantly reply me with the links that can resolve my issue. This is shown in the image below:

Use the help menu in Windows 10

Article about saving a Word document

Method # 4: Use the Help Wizard

The last method of getting help from Windows 10 is actually an extension of the third method. When you will click on the help link provided by the Get Help wizard, it will redirect you to the full article so that you can read it. At the bottom of this article, you will find a contact information through which you can contact Microsoft for getting help. This is shown in the following image:

Using Windows 10 Help Wizard

Conclusion

By following any of the methods mentioned above, you can get help from Windows 10 very easily and make your experience with Windows 10 more soothing and friendly. In this way, you will never find yourself in trouble or if you do get in trouble, then Windows 10 help will always be at your service.

The post How to Get Help in Windows 10 appeared first on FAQforge.

How to Defragment Hard Disk Drive in Windows 10

$
0
0

Over the time, you write and save different files on your computer system. Initially, your hard disk is programmed to save data on it sequentially by default. However, as you remove files from the hard disk by deleting them, the sequential arrangement of files get disturbed and certain gaps are created between different file locations. Sometimes, the new files are so small that they can easily fit into those gaps but at times, those files are too large that only a part of them can be saved in a gap. Such files are not saved completely on contiguous locations; rather different parts of these files are saved on multiple different locations. The scattered saving of these files is known as fragmentation.

Fragmentation causes your computer system to slow down as it takes a lot of time in accessing the hardware multiple times in order to seek for different pieces of a file and then to fetch them. To stop this from happening, Windows 10 provides you with the Optimize Drives utility, which lets you defragment your hard disk drive. By defragmentation, it means to bring the scattered pieces of a file together and then save them at contiguous locations so that disk access time can be reduced. This makes your computer system performance efficient. In this article, we will explain to you the methods through which you can defragment your hard disk drive using Windows 10.

Methods of Defragmenting Hard Disk Drive in Windows 10

For defragmenting your hard disk drive using Windows 10, you can make use of any of the following two methods explained below:

Method # 1: Optimize Drives utility

In order to defragment your hard disk drive using this method in Windows 10, you need to proceed as follows:

Type Defragment and Optimize Drives in the search section of your taskbar and click on the search results to launch the Optimize Drives utility window.

Optimize Drives utility

The newly opened Optimize Drive utility window is shown in the image below:

Optimize Drives

Now you need to look at the current status. If it is set to Ok, it means that you do not have to defragment your hard disk drive because it is not that much fragmented that it can affect the performance of your computer system.

Still, if you do want to analyze the percentage fragmentation of any of your drives, you just need to click on that particular drive and then click on the Analyze button. The analysis will automatically start and when it will finish, it will tell you the percentage fragmentation of that drive. If that percentage is more than 10%, then it is advisable to defragment your drive by clicking on the Optimize button otherwise not. In this case, I analyzed the C drive but its percentage fragmentation was less than 10% so there is no need for defragmentation. It is shown in the following image:

Analyze drive

After analysis or after the defragmentation, you can click on the Close button to close this window.

Method # 2: Use File Explorer

The second method of hard disk drive defragmentation using Windows 10 is as follows:

Type File Explorer in the search section of your taskbar and click on the search results to launch the file explorer window or click on the file explorer icon from the taskbar.

Windows File Explorer

Now click on the drive that you want to Optimize. In this case, I have clicked on the C drive.

Optimice C: Drive

Now click on the Manage tab located at the ribbon and then click Optimize. It is shown in the following image:

Manage > Optimize

As soon as you will click on Optimize, the Optimize Drives utility window will pop up which is shown in the image below:

Optimize Drives utility window

After opening this window, just follow the steps 3 to 5 of Method # 1.

Optimize the C: Drive

Conclusion

By following any of the two methods mentioned above, you can perform the defragmentation of your hard disk drive and optimize its performance. Usually, it is recommended that you should perform the defragmentation process every month. It is a common practice to defragment any drive when its percentage of fragmentation exceeds 10%. Unnecessary defragmentation can cause damage to your hard disk drive. All you need to do is just to keep a check on the percentage fragmentation of your drives by using Optimize Drives utility and whenever you find this percentage crossing the threshold value of 10%, you can perform the defragmentation in order to improve the efficiency of your computer system.

The post How to Defragment Hard Disk Drive in Windows 10 appeared first on FAQforge.

How to Create and Edit a Windows 10 Registry File

$
0
0

Windows registry file is, in fact, a database that contains all the information corresponding to all the hardware devices and the software programs installed on Windows operating system. It is a simple text file with .reg extension. You can perform multiple operations on Windows 10 registry file depending upon your needs. For example, you can back up the contents of Windows 10 registry file, you can create a new registry file, you can modify an existing registry file and you can delete a particular registry file. In the course of this article, we will try to explain to you the methods through which you can create and edit Windows 10 registry file. First, we will tell you how to create a new registry file and then we will explain to you how you can edit the registry file.

Creating a Windows 10 Registry File

For creating a new Windows 10 registry file, you need to proceed as follows:

Type notepad in the search section of your taskbar and click on the search results to open a new text document or right click anywhere on your desktop. From the cascading menu, click on new and then select Text Document from the sub cascading menu. It is shown in the image below:

Create a new plaintext document

The newly opened notepad window is shown in the following image:

Notepad editor

You can create registry files for multiple purposes but in this example, we will tell you how to create a registry file for setting the default page of Internet Explorer. For doing this, you need to type the code shown in the image below in your newly created notepad file. In the code shown below, the content written in square brackets is the complete path of your registry file. Whereas Start Page is the key and www.microsoft.com is its value. You can give any path to your registry file and create any key-value pairs. For example, you can set the Start Page key to the value www.google.com.

Example registry file

After typing the code shown above, you need to save your registry file. For doing this, click on the File menu located at the top left corner of the screen and then select the Save As option.

Save registry file

The Save As dialogue box will pop up which is shown in the image below. Here, you are supposed to set the name for your new registry file and then save it with the .reg extension.

Save file dialog

After saving the registry file, you can easily find it in the assigned location. In this example, our registry file can be found in Documents. It is shown in the following image:

The saved registry file

Hence, you can verify the creation of your new registry file using Windows 10.

Editing a Windows 10 Registry File

For editing an already existing Windows 10 registry file, you need to proceed as follows:

Type Run in the search section of your taskbar and click on the search results to launch the Run prompt. It is shown in the image below:

Open run app

Type regedit in the textbox and then click OK.

Start regedit program

This will launch the Registry Editor which is shown in the following image:

Windows Registry Editor

From the left panel, select the registry file that you want to edit.

After going to that file, just click on the File menu and then click export. It is shown in the following image:

Esport option of Windows Registry Editor

Doing this will allow you to save this file at your desired location as shown in the image below:

Save Windows Registry Export

After naming the file, just click on the Save button.

You can access this file simply by going to the location where you have exported this file. In this example, I have exported the desired file on the Desktop. It is shown in the image below:

Esported Windows Registry snippet

For editing this file, you will need to open it with notepad. For doing this, just right click on the file and then select Open With Notepad as shown in the following image:

Open .reg file with notepad

This will open your exported registry file in notepad. The contents of this file are shown in the image below:

Registry file in notepad

Once you successfully manage to open this file, you can easily make any sort of modifications you want.

After making the desired changes, just press Ctrl+ S to save your newly edited registry file.

Conclusion

In this article, we taught you the methods through which you can create and edit the registry files in Windows 10. These methods are really easy and convenient to use. You just need to follow the steps correctly and in the right sequence and once you manage to do it successfully; you can easily create new registry files and make modifications to it as per your own requirements.

The post How to Create and Edit a Windows 10 Registry File appeared first on FAQforge.

Viewing all 392 articles
Browse latest View live


Latest Images